Auto show hobbyists find themselves meeting new challenges as they begin the process of preparing their entries, whether they are working on an antique, a classic, or a new vehicle. Finding how to use the best automobile detailing supplies to achieve the wanted results is a matter of trial and error. Proper planning helps find the logical sequences for the best results. Also, the hobbyist must become an expert in many areas, knowing how to detail the tires and wheels of their cars as well as knowing how to clean cars upholstery.
Preparing the wheels, wheel wells, tires, spokes, and hubcaps of a vehicle for a show demands consistent time and effort – and the proper auto detailing cleaning products. Detailing on a regular schedule (for instance, once a month) prevents a final detailing before a show from being an overwhelming task. Working in this area first also saves time and effort. Tires, wheels, etc., should be detailed before the rest of the car because the products that are most efficient for this job can be harmful to the finish of the car’s paint and can, at the least, spoil the polish job. You won’t be accidentally splashing the just waxed body of your car with the tire cleaner. Perfection in the tire area truly gives the look of “showroom” condition.

Be sure to work in the shade and not in the heat or full sun. This is not the kind of hot car you are aiming for. Full sun can cause streaks. Have your cars detailing supplies laid out and ready. Remove your hubcaps or any other part of your wheel area that can be taken off. This way, you can really get at the tires, and also wash all sides of the removable parts. Some serious detailers will even remove the tires. Take the time to wash, rinse, and dry each tire before moving on to the next one. Completing each, in turn, will prevent any water spots from drying on the surface of the wheel.
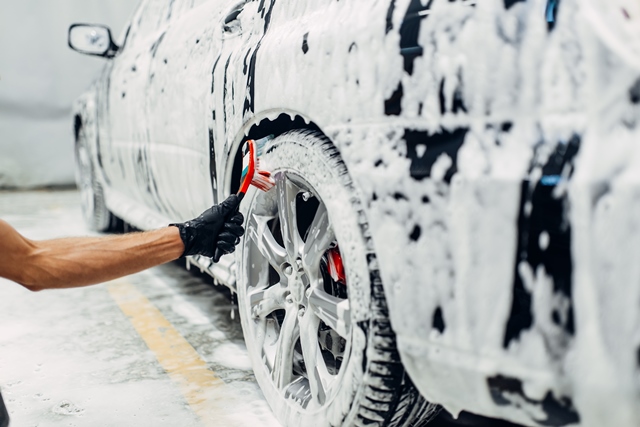
Begin by carefully rinsing away any dirt or mud that might have coated the underbelly of the car or wheel wells. The second type of soil that is found in the tire area is brake dust. This material is gray in color and caused by the wear and tear on the brake pads. Do not use an excessively forceful water stream to rinse your tire area, since small rocks or sand could spin with the force of the water and scratch the surface of the car. You may use a soft brush to dislodge soil as you rinse. Try a soft-bristled brush like Fuller Brush’s Vehicle Wash Brush. Mix a mild degreaser with water in a large bucket. Gently wash each tire and wheel with a soft wash mitt (or sponge. Each time you are ready to dip your mitt in the bucket of degreaser, remember to first rinse off your mitt so any particles of rock or sand will be removed. That way, you won’t be simply moving the soil around, and you won’t risk scratches to the wheel surfaces. (Also, to avoid scratches to the finish on the body of the car, use a different mitt for that area.) Finish with a detailing brush like Fuller’s Wheel and Spoke Detailing Brush. You will be able to thoroughly clean every bit of dirt from your tires without a scratch, and you will be ready for the next step, dressing and polishing the surfaces. Pay special attention to your manufacturer’s directions when you choose a treatment or polish for this part of your car. The wheel area and hubcaps can be painted or non-painted, and be made of a variety of different materials. Choose cars detailing supplies that will be most effective for the materials in your car. Don’t worry about treating the tread of the tire. It will just rub off. Treating it may also affect your warranty.
As soon as the tire area is completely detailed, you are ready to move on to work on the rest of the car. Before you know it, others will be noticing your “hot car.”


